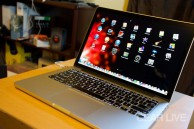
Bleeding Edge TV 410: Apple iMac RAM upgrade tutorial

Posted by Andru Edwards Categories: Full Episodes, Gizmatic, Apple, Features, PC / Laptop, Podcasts, Videocasts, Videos,
In this episode we teach you how to install RAM in your Apple iMac. The model we are using is the 27-inch 2011 iMac, which has a quad-core processor and supports up to 4 RAM chips. Installing your own RAM is an easy way to save a lot of money, rather than paying for the extra RAM with the iMac. In our case, we install 16 GB of RAM in under 5 minutes, saving ourselves over $500 in the process - and it is so easy that anyone can do it, and all you need is a Philips screwdriver and a little courage.
As you see in the video, all you need to do is unscrew the RAM cover, and pull on the tabs to remove the RAM that ships with the iMac. From there, you simple insert the new RAM, push it in until it clicks, and reinstall the cover. Turn it on, and go into About This Mac to get a look at the amount of RAM that your system is recognizing. If it is showing the amount you installed, you are done! Even better, you just saved yourself a bunch of cash as well. You can pick up the RAM at Amazon for a great price, and of course, the iMac is there as well.
Big thank you to MozyPro and JackThreads for sponsoring the show - be sure to check them out! MozyPro provides simple, automatic, and secure data backup. As for JackThreads, we've got exclusive invite codes that give you $5 to use towards anything you'd like on the site.
Gallery: Bleeding Edge TV 410: Apple iMac RAM upgrade tutorial
Advertisement
Advertisement
© Gear Live Media, LLC. 2007 – User-posted content, unless source is quoted, is licensed under a Creative Commons Public Domain License. Gear Live graphics, logos, designs, page headers, button icons, videos, articles, blogs, forums, scripts and other service names are the trademarks of Gear Live Inc.


